Vacuum – one of the most effective exercises for strengthening the abdominal muscles. It arose from the ancient practices of yoga, and gained its popularity during the “golden era of bodybuilding.”
The calling card of athletes of that time was the so-called V-shaped figure: developed shoulders, a wide chest and, of course, a flat, sculpted stomach and a narrow waist. Bodybuilding legend Arnold Schwarzenegger admitted that such an aesthetic combination is achieved largely through the “abdominal vacuum” exercise.
To understand why to do a vacuum, how to do it and how the effect of its implementation occurs, let us turn in the article to the structure of the abdominal muscles.
Anatomy of the abdominal muscles
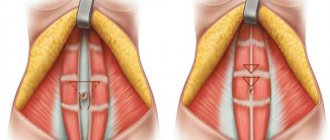
The abdominal press consists of external and internal muscle groups:
- External abdominal muscles: Rectus.
- External oblique.
- Internal oblique.
The deepest layer is formed by the transverse abdominal muscles, which encircle the waist and act as a natural corset.
That is, it is this muscle group that is responsible for supporting the internal organs and a flat stomach. The absence of loads on the transverse muscle group contributes to:
- The appearance of excess weight at the waist, since the fibers of these muscles are of the slow type, using subcutaneous fat as an energy source.
- Lack of strength in the muscle corset, which leads to the internal organs squeezing the abdomen forward.
Classic exercises for training the abs (lifting the body, legs, twisting, etc.) mainly work only the external muscle groups that form the relief.
To effectively strengthen the transverse muscles, it is necessary to do static (isometric) exercises. Along with the plank, the best example of a static exercise for developing the internal abdominal muscles is the vacuum .
Why do the abdominal vacuum exercise
Many people want to get a flat stomach without “killing” their abs with numerous dynamic exercises that develop muscle thickness but do not give much results. The static vacuum exercise actually flattens the waist, especially when viewed from the side. The fact is that the vacuum strengthens the internal abdominal muscles, and they are located under those muscles that are trained with the help of dynamic crunches that are familiar to us. Leg crunches and leg raises work the external muscles - the rectus abdominis and external obliques - while the vacuum works the transversus abdominis and internal obliques, which are located under the external obliques.
It is the internal muscles that stabilize the spine, and their atony leads to protrusion of the abdomen forward, and with it the spine and internal organs. As a result, a small roll forms in the lower abdomen, even when performing dynamic abdominal exercises. Therefore, performing a vacuum will tighten and tone those same muscles and make the stomach noticeably flatter and reduce the volume of the waist. But this is achieved not through fat burning, as many people think, but through the impact on stabilizer muscles that have ceased to perform their functions.
The vacuum should be performed by those who notice the above-described picture in the mirror - the appearance of the abdomen and its protrusion, curvature of the spine, the appearance of hyperlordosis of the lumbar region.
How is it useful?
Systematic implementation of abdominal vacuum allows:
- get rid of a stretched and bulging belly;
- significantly reduce your waist size;
- strengthen the abdominal muscles;
- visually enlarge the chest;
- improve posture;
- stabilize the spine and reduce pain in the lower back;
- improve digestion and blood supply to the abdominal organs;
- strengthen the diaphragm muscles;
- reduce the visceral layer of fat that accumulates near the internal organs.
In addition, vacuum gymnastics classes do not require special equipment and are suitable for performing at home and in the office.
Types of vacuum massage
Vacuum massage can remove an overhanging belly and smooth out defects on it (cellulite and stretch marks).
First let's see what it might be like.
Hardware
The salon uses different types of devices to perform vacuum massage.
- Vacuum roller massage.
The nozzle creates a vacuum, and the roller inside it additionally massages the area captured by the device. - Laser-vacuum massage.
Combines the effects of laser and vacuum.
Home hardware
Modern industry offers options for vacuum devices for home use. This device is a vacuum jar that is attached to a plastic handle. Some models are complemented by a roller to enhance the massage effect. Such devices operate on mains power or batteries.
This is relatively expensive and not the most convenient option.
Canning
Cupping massage is best suited for independent use.
It can be dynamic and targeted.
Acupressure cupping is a more complex technique. Banks are applied to specific areas. As a rule, the procedure is performed by a master, and not independently. Here you need to know the biologically active points, monitor the strength and duration of the vacuum. Often this massage is done on the back - you can’t install cups there yourself.
Dynamic cupping massage is the simplest and most convenient way. It is best suited for working out the abdomen at home. You stick the can to the problem area and slide along it in certain directions.
How is it done?
In order to do a stomach vacuum correctly, you need to understand its technique. Although at first glance it seems simple, this technique consists of many nuances, mainly related to the intricacies of proper breathing, and includes the following steps.
Namely:
- Position yourself in the starting position.
- Take a deep breath through your nose, trying to direct the air not so much into your lungs as down your stomach. The press should move forward.
- Exhale sharply through your mouth, trying to release all the air out. To do this, you can use the sound “Pha!”
- Hold your breath.
- As you exhale, pull your stomach in as much as possible towards the spine and up, under the ribs.
- Stay in the position as much as possible. To begin with, the duration of the isometric contraction can be 10-15 seconds.
- Gradually relaxing your abs, inhale slowly.
- In the starting position, inhale and exhale 2-3 times, then repeat the exercise the required number of times.
It is necessary to make a vacuum on an empty stomach or 3-4 hours after eating.
Depending on the initial position, the abdominal vacuum is divided into four types:
- lying down;
- on the knees;
- sitting;
- standing.
The technical component of the exercise in each position remains unchanged. The only difference is the complexity of its implementation.
Vacuum lying down
The supine vacuum is considered one of the easiest to perform and is suitable for any beginner. In this position, gravity itself helps to retract the abdominal muscles.
How to do:
- Sit on a flat surface.
- Straighten your arms along your body.
- Bend your knees or stretch your legs forward.
- Apply the vacuum using proper technique.
Vacuum on your knees
As soon as you have mastered the technique of the “vacuum” exercise and can easily do 3-5 approaches of 1-2 minutes in a lying position, you can begin to vacuum on your knees (“on all fours”).
This option is considered somewhat complicated, because in this case you need to create a vacuum against gravity.
How to do:
- Sit on your knees.
- Place your palms on the floor at shoulder level.
- Do not bend your elbows and make sure your back is straight: do not slouch or arch your lower back.
- Apply the vacuum using proper technique.
Vacuum sitting
Sitting vacuum is another complicated option that uses the stabilizer muscles responsible for maintaining the balanced position of the spine.
How to do:
- Sit on a chair or any flat surface.
- Place your hands on your knees.
- Do not lean against the back of the chair.
- Control the position of your back: it should remain straight.
- Apply the vacuum using proper technique.
If desired, you can complicate the task and increase the load in this position. To do this, you need to sit not on a chair, but on a surface that provides unstable support, for example, a fitball.
You can also do a vacuum in the abdomen while sitting on your knees (not to be confused with a vacuum “on all fours”, where the body is parallel to the floor):
- Get on your knees.
- Take a sitting position.
- Move your hips away from your heels by 20-25 cm.
- Make sure that the body is perpendicular to the floor.
- Apply the vacuum using proper technique.
Vacuum standing
As you progress, move on to the most difficult type - standing vacuum. This option will allow you to maximize the use of the internal abdominal muscles and back stabilizer muscles.
How to do:
- Stand straight with your feet shoulder-width apart and knees slightly bent.
- Straighten your arms along your body.
- Make sure your back remains straight and your shoulders down.
- Apply the vacuum using proper technique.
There are several more variations of performing a vacuum from a standing position:
- Simplified standing vacuum. The hands are placed on the knees, the body moves forward, resulting in additional support.
- Complicated standing vacuum. The hands are placed behind the head, which allows the upper abdominal muscles to be even more involved in the work.
CrossFit: complex for advanced
Such exercises can only be performed by advanced people who have perfectly mastered the vacuum, and now want to complicate their training.
The technique involves step-by-step implementation of the following steps:
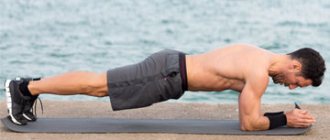
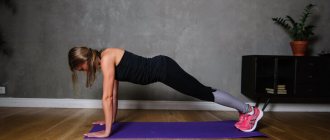
- Do planks for at least 1 minute. In this case, the line of the body should be straight; you cannot bend your back in the lumbar region or bend your knees. If you cannot stay in the position for 60 seconds, you should postpone this complex and train in a simplified mode.
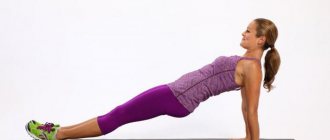
- After this, you should perform 15 crunches , that is, pump up your abs, but at the same time raise your legs bent at the knees with your torso so that with each lift your knees touch your head.
- Do 5 repetitions of the vacuum exercise while standing on all fours . In this case, the breath should be held as much as possible, and when retracting, the person should feel the tension of the abdominal muscles.
- Raising straight legs in a hanging position. In this case, the body should be motionless. You can hang on the wall bars, this will make it easier to do. There are also special simulators that make it easier to perform. The athlete can rest on them with his arms bent at the elbows. In any case, the legs should not rest anywhere, otherwise the exercise will not bring results.
This workout can be repeated 3 times a week.
Vacuum is a popular exercise among beginners and advanced athletes who want to reduce abdominal volume.
There are some contraindications that should be taken into account before starting classes. But if done correctly, the result will not be long in coming.
Efficiency
- The effectiveness of a vacuum for the abdomen directly depends on the regularity and intensity of training. Obviously, after a few sessions, your stomach will not become flat and your waist will not become thin.
- It is very important to do the vacuum daily or at least 5 times a week, and also to constantly improve and complicate this exercise.
- If initially you can hold your breath and contract the abdominal position for 10-15 seconds, then gradually try to increase this time by 1-2 seconds.
- When one isometric contraction when performing a vacuum from a lying position is 40-50 seconds, you can do a vacuum on your knees, then do a vacuum from a sitting position, and, in the end, the most difficult option - a standing vacuum. But this is not the limit, because you can master the “nauli” technique - vacuum using wave-like movements of the abdominal muscles.
The result of performing a vacuum will appear even earlier if you control the internal transverse muscles throughout the day. To do this, you don’t need to hold your breath or suck in your stomach, you just need to always keep your abs tense. After some time, this will become a habit and the key to a flat stomach and a wasp waist.
How often to do a vacuum and for how long?
Vacuum is not contraindicated when performed daily, but it is best to perform it after the main set of exercises 3-4 times a week, then the exercise will be more effective.
- Beginners should hold their breath for 10 seconds, gradually increasing to 15 seconds.
- Advanced ones can hold their breath for up to 20 seconds.
Rest between approaches should be from 20 to 30 seconds; in the future, the rest time can be reduced.
- The optimal number of approaches for beginners: 3-5 cycles of breath holding;
- for advanced: 8-10 cycles.
Useful tips
The best tips for performing a vacuum and subsequently losing weight:
- Perform the vacuum on an empty stomach . It is best if this becomes a daily habit: do a vacuum in the morning before breakfast or in the evening shortly before bed.
- In order to master the correct technique , initially do the vacuum in its simplest variation - from a lying position.
- Pay attention to proper breathing : you need to learn to “breathe with your stomach.”
- Use the sound "Pha!" in order to completely release the air out when exhaling;
- When making a vacuum, try to “glue” the navel to the spine and at the same time pull the internal organs under the ribs;
- Hold the vacuum as long as possible , listening to your feelings.
- Each workout, try to increase the time of isometric contraction by 1-2 seconds.
- Relax the retracted abdomen slowly and gradually , then the transverse muscle will work throughout the entire exercise.
- Do 2-3 sets of the abdominal vacuum exercise, 10-15 repetitions.
- Rest between sets for 1-2 minutes.
How to learn to make a “vacuum”: tips for beginners
Work separately on the technique of breathing with delays and the technique of retracting the abdomen - it is convenient to do this in front of a mirror. If it is difficult for you to maintain the required breath holding time, you can take small inhalations and exhalations that do not affect the technique. If your vision gets dark and you feel dizzy, stop doing the exercise, restore your breathing and rest.
Is vacuum gymnastics safe for the abdomen?
Abdominal vacuum is an exercise that does not require professional coordination, specialized equipment or knowledge. If the correct technique is followed, as well as the absence of contraindications, discomfort and unpleasant sensations, vacuum gymnastics cannot harm the body and is safe.
In yoga, it is generally believed that vacuum helps rejuvenate the internal glands, nerves of the gastric tract and intestines, removes toxins, improves blood supply to internal organs and strengthens the back muscles.
Recommendations for Beginners
What are the benefits of abdominal vacuum for women?
- Firstly, the vacuum exercise improves blood circulation and tone in the pelvic muscle organs, and this has a beneficial effect on reproductive function and hormonal levels.
- Secondly, only with the permission of a doctor can a vacuum be performed after childbirth, namely at the end of the postpartum period, for at least 42 days.
- The exercise will tighten stretched abdominal muscles and restore the functions of internal organs and improve appearance.
Why is it worth doing a vacuum for men?
I recommend that representatives of the stronger sex include a vacuum in their training and remember the form of Arnold Schwarzenegger in his youth. With developed muscles, namely a wide back and huge pecs, the bodybuilder’s waist was thin and his stomach was flat, which added aesthetics to his appearance.
Is it possible to do a vacuum during menstruation?
Despite its safety, benefits and effectiveness, vacuum has its limitations. In women, tension in the internal abdominal muscles as a result of performing it causes contractions of the uterus.
Therefore, it is strictly forbidden to make a vacuum:
- During menstruation (menstruation, because the vacuum will increase bleeding).
- During pregnancy (since a vacuum can provoke some undesirable consequences, including miscarriage).
- Immediately after childbirth (how long after childbirth will be determined only by a gynecologist).
Which jars to choose for massage
There are many different vacuum cans: rubber, silicone, glass, latex.
Some need to be warmed up first before being placed against the body. This is how ordinary medical glass jars work, but only professionals can handle them; there is a risk of getting burns.
A simpler option is glass jars with a pear. They “suck in” by pressing on the bulb; there is no need to heat anything.
But it is best to choose rubber or silicone jars for home use. They are light, unbreakable, convenient, inexpensive, and easy to work with. The best option for beginners.
Moreover, rubber cans are stiffer than silicone cans; they expand back better after compression, which is why they have stronger suction. Rubber is better suited for powerful work than silicone.
For vacuum abdominal massage, you can purchase Beauty365 MIRACLE jars (sold at www.beauty365.ru). This is a set of rubber cans of different diameters, all of them are designed for the body. Try working with different sizes, but it is better to choose larger jars.
Contraindications
There are several other contraindications for which vacuum gymnastics should be abandoned:
- Stomach ulcer.
- Duodenal ulcer.
- Other diseases of the abdominal cavity.
- Recovery period after surgery.
- Diseases of the respiratory system.
- Diseases of the cardiovascular system.
- The period of exacerbation of chronic diseases.
- Infection.
- Dizziness, abdominal pain, as well as other unpleasant sensations that occur during the vacuum.
It should be understood that the absence of the above circumstances is not a guide to action. And before you start regularly doing a vacuum, you need to consult a doctor.
Vacuum is an extremely effective and easy-to-perform local exercise for the abdominal muscles. But, of course, it does not get rid of subcutaneous fat on the stomach and body.
In order for your waist to really become aspen and beautiful, you need a whole range of measures: regularly engage in cardio training (aerobic exercise) and adhere to proper nutrition.
Reviews
Those who practice breathing exercises technically correctly and regularly leave mostly positive feedback and show their amazing results in before and after photos. In reviews of the “abdominal vacuum”, some claim that after just two weeks of regular exercise you can lose 3 cm in your waist size.
In modern actively developing social networks, there are entire marathons that are organized online, where trainers supervise their subscribers and lead them to lose weight in the abdominal area. In these marathons, they tell you how to do the “vacuum” exercise for the abdomen, what the correct technique is, and how to achieve quick positive results.
But in fact, the defining points here are the following:
- no contraindications;
- regularity of trainings;
- compliance with the rules of correct technique.
If you strive to achieve your goal, you should also avoid mistakes. Many beginners often commit them in the initial stages. What not to do:
- Exhaust yourself and take short breaks between approaches - rest should be at least 40 seconds.
- Eat food before exercise - it should be done on an empty stomach.
- Ignore abdominal pain - the body gives signals, and you need to listen to them.
- Not reacting to dizziness is, in fact, a common occurrence, but it cannot be ignored.
By following the correct exercise technique and avoiding common mistakes, you can get what you are doing for.
Advantages and disadvantages
The main advantage of a vacuum is its high efficiency and versatility. It can be done anywhere and anytime. No sports equipment or special clothing is needed. It is also valued for the beneficial effects it has on the body:
- massages organs;
- normalizes digestion, stimulates peristalsis, tidies up the stool;
- improves metabolism;
- removes waste from the body;
- reduces volumes;
- burns visceral fat;
- strengthens abdominal muscles;
- straightens posture, relieves pain syndromes in the spine;
- prevents the formation of hernias.
Flaws:
- a large number of contraindications;
- complex execution technique;
- achieving results takes too long: sometimes you have to wait six months or even longer;
- feeling of discomfort in the abdominal area;
- side effects.
Despite all the effectiveness of vacuum, trainers and doctors warn about side effects and complications when it is performed regularly against the background of existing contraindications - even visceroptosis.
The main disadvantage of this exercise is high intra-abdominal pressure. With obesity, it itself is high, and the vacuum increases it even more, which leads to sad consequences:
- injuries of the distal esophagus;
- hiatal hernia;
- gastroesophageal reflux disease.
To avoid such consequences, you need to observe contraindications, perform it correctly and be constantly monitored by doctors.
Through the pages of history. The vacuum was first demonstrated by Frank Zane, an American bodybuilder who in the late 70s of the last century was a three-time winner of the Mr. Olympia title.
Bruises appeared after a vacuum massage - is it scary?
Are there any bruises? Do not be afraid.
Some “experts” will tell you with an important look that this should not happen. But practice shows that bruises are a normal reaction if you have an old problem. They indicate that you have severe congestion, the capillaries are imperfect, and the skin tone is reduced.
The sooner you start recovering, the better. Once bruises appear, it means positive processes have begun.
In the basic marathon “SmeloNET” (“optimum” tariff), you will learn how to dose the vacuum correctly, which will help you delicately go through the transition period.
Existing capillaries will strengthen, new ones will sprout - the bruises will soon resolve and will not appear again.


