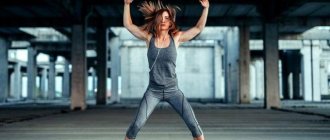
In fitness, each muscle group has its own complex, but there are also universal exercises that work literally all major muscle groups. One of them is the “bridge”.
- Benefits: what are the benefits of the bridge exercise?
- Harm: contraindications to exercise
- How to learn to make a “bridge”?
- Lying hyperextension
- "Half Bridge"
- "Camel"
- "Onion"
- Video: What exercises need to be done before standing on the “bridge”
- “Bridge” with emphasis on the shoulders
- Reverse plank
- "Bridge" on fitball
- Technique for performing the classic “bridge”
- Useful tips for beginners
- Video: How to properly stand on the “bridge”. The most common mistakes
Rules for performing the exercise
Ideally correct execution of the bridge exercise is possible with good flexibility and a sufficient level of preparedness. So, the main points of this design of the bridge:
- Arched back. No matter how much it hurts the ears or eyes of experienced strength athletes, in the context of flexibility exercises, it is the maximum convexity and concavity that are indicators of progress;
- The head and shoulders should be lowered below the line of the buttocks, which again characterizes the level of plasticity;
- Limbs clearly fixed on the floor - palms and feet should not come off the floor, they should not be held on the surface by force, the body position should be as comfortable as possible;
- Your palms should be shoulder-width apart from your feet. Of course, such a result cannot be achieved in a week, but if you set a goal and practice regularly, then nothing is impossible;
- Body weight is evenly distributed between the legs, back and arms. You cannot support yourself using only your back - this can lead to injuries, pain, and it also looks ugly;
- Measured breathing without delays.
Set of exercises
Each stage of the gymnastic bridge can be considered as a separate exercise, try it in combination, alternate with others. Only after it has been completely mastered can you move on. The bridge can be performed in two positions: lying down, standing.
From a lying position
- Lie on your back, bend your knees. Place your feet together so that your knees point up.
- Place your palms on the floor next to your head. In this case, the fingertips should be facing the shoulders, the palms themselves are firmly pressed to the floor, and the elbows are raised up.
- The body must be lifted into the air from a lying position after the shoulders push the body. You need to straighten your arms as much as possible. The muscles of the torso, legs, buttocks are tense.
- If you cannot fully stand on the bridge, you can lift only your hips from the floor. Hands pressed to the sides. To raise the hips, the torso and buttocks are tensed.
- You need to stay in this position for a few seconds and then return back. Bend your arms and slowly lower your body to the floor. Take a short break and then repeat the exercise 2-3 more times.
It’s not scary if you still can’t get on the bridge correctly. Even during attempts, the strength of the arms, legs, and torso increases, their endurance and flexibility develop.
Back bend against the wall
- Move one or two steps away from the free wall. Place your feet shoulder-width apart.
- Place your hands on your buttocks and push your hips forward. Raise and stretch the chest and spine. This stretch will make it easier to further arch your back.
- Stretch your arms up, tilt your head back. Bend your neck and back so that you can see the wall.
- Bend your back, lean your hands against the wall. The elbows should be straight, the head tilted back, and the neck extended. Palms pressed against the wall.
- Hands begin to move along the wall, going as low as possible. Elbows remain straight, breathing is even.
- Return to a standing position.
- Move further away from the wall and repeat the exercise. Each time you increase the space, your back will bend more without additional support.
Advice! In order to relax your back after a gymnastic bridge, you need to make several smooth bends forward, trying to reach your fingertips with your hands, or sit on the floor, wrap your arms around yourself well and sway a little.
For advanced people – from a standing position
- Stand on the bridge from a standing position with support. This could be a friend, relative, or an experienced personal trainer at a yoga studio. The same technique is used as with the deflection near the wall.
- The assistant's hands should lie on the lower back and stomach. It will help you lower and rise to the starting position. To return to the starting position, you need to lift your lower back with both hands.
- At the next stage, the bridge is performed without a personal fitness trainer. Once you have mastered the confident execution of a bridge with support, you can try to stand on the bridge yourself. To do this, you need to raise your pelvis, chest, bend and tense your arms, stretch them behind your head. Feet shoulder width apart.
- If you can’t fully lower yourself into the bridge, you can take a break and try a little later. It is important to remember the technique at the wall, do not forget about breathing.
Advice! In order not to worry when getting up to the bridge on your own from a standing position, you can put pillows under your back and not worry about falling or injuring yourself.
In order to return to a standing position, you need to push your chest up, swing your legs forward, let your hands come off the floor, and slowly return to a standing position. To stabilize the body, you need to tense the muscles of the abs, thighs, and buttocks.
Learning to do a bridge from a standing position at home is not as difficult as it seems at first glance, but you need to know all the subtleties and features. You can do the exercise at home, but it’s better to go to a fitness club, where experienced instructors will tell you, help you, and put you on the bridge in a short time without stressing the body.
How to make a bridge correctly, beautifully and plastically
The main rule when performing a gymnastic bridge is the smoothness and clarity of movements. There is no need to make sudden movements, try to jerk down below the usual level or forcefully “fold”, pulling your legs towards your head. All these points can lead to injury or damage, pain.
The regularity and ease of movements during the execution of the bridge show not only the level of mastery of the technique, but also developed flexibility, a sense of balance, and impart additional elegance and aesthetics.
Making a bridge correctly is not difficult; the ideal execution technique is described above. To perform beautifully, you just need to add smoothness and slowness, as well as fixation in the final position.
Execution technique
Before we talk about how to stand on the bridge, let's determine what exactly the body position should be in this pose:
- When performing a bridge, your back should be arched. A bridge with a straight back, made at the expense of the limbs, is incorrect.
- The buttocks should be higher than the head and shoulders.
- The limbs should be as straight as possible, the hands should be on the palms, and the legs should be on the feet. The distance between the palms (as well as between the feet) should be equal to the width of the shoulders. Achieving this level of performance is not easy, but we are now talking about the ideal option.
- Breathing should be free, without delay.
In order to learn how to perform a bridge correctly, you need to consistently practice all the exercises leading up to it. Let's list these exercises, and then give a description of each of them. They are arranged in order of increasing difficulty:
- Bridge with emphasis on the shoulders.
- Straight bridge (you may have heard of this exercise called the “reverse plank”).
- Bridge from the bench.
- Half bridge.
- Classic full version.
Actually, you can stop at the fifth point, however, there is no limit to perfection. Therefore, we move further towards complexity:
- Bridge along the wall down and up.
- Entering the bridge from a standing position.
- Lifting from the bridge to a standing position.
Benefits of exercise
The seemingly simple bridge exercise has many positive aspects for health and appearance:
For the most part, our daily activities involve sitting at a workplace, driving, cooking, cleaning, and so on - all these moments are associated with rounding of the spine, leading to the appearance of a stooped back and shoulders, which does not look very aesthetically pleasing. Performing a bridge allows the muscles to bend in the opposite direction, warm up, eliminate problems with intervertebral discs due to weak blood flow in this area, and also restore beautiful posture and straight shoulders;
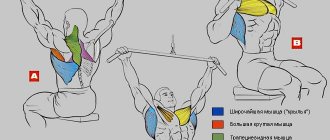
- The bridge trains many muscles. First of all, the deep back muscles are trained - the rectifiers, the so-called columns. They serve as the main and support for the spine. In addition to them, the gluteal muscles, hamstrings, and muscles of the upper body (shoulders and arms) are used to varying degrees.
- Performing this exercise allows you to stretch almost the entire body at one time - quadriceps, abs, pectoral muscles, even the neck. This is an excellent prevention of osteochondrosis of the cervical spine, which affects most of the modern generation due to sedentary work;
- The development and strengthening of the back muscles allows you to improve the effectiveness and duration of strength training, which is especially important for athletes who regularly perform back exercises with weights (dumbbells, barbells);
- During the deflection of the upper part of the body, the chest “opens”, which has a positive effect not only on posture, but also on the functioning of the cardiovascular system, and also facilitates breathing;
- Regular bending upside down develops the vestibular apparatus, activates blood flow and improves blood supply to the blood vessels of the brain;
- The smallest, but still pleasant moment - the impressiveness of correctly performing a bridge in the gym will definitely attract the admiring glances of all those who do not know how to do it.
Classic bridge
Having learned to easily stand on the bridge from a support, you can move on to practicing the stand from a lying position.
Starting position: lying on your back, feet near your buttocks, shoulder-width apart, hands resting on the floor with palms on both sides of your head, fingers pointing toward your shoulders. Using your arms and legs, push your body up and, bending your back, try to straighten your limbs. After you get into the bridge position, freeze in this position and then return to the starting position. Practice the rack until you achieve 15 reps in each of two sets.
The correct technique for performing the bridge exercise must meet the following conditions:
- The deflection in the back is maximum, the body should take the shape of an arc.
- Arms should be straight, palms placed under the head.
- The pelvis should be raised as much as possible and above the level of the head and shoulders.
- You should strive to straighten your legs; a slight bend in the knees is allowed.
- Breathing is even and deep, and should not be interrupted.
Harm and contraindications
Despite the many positive aspects of performing a bridge, this exercise also has several contraindications:
- headaches, migraines, high blood pressure. Due to increased blood circulation, bridging may lead to aggravation;
- diseases of the spine;
- diseases of the gastrointestinal tract;
- pregnancy.
How to learn to make a bridge
There are two versions of taking the desired body position:
- the so-called bridge from the floor, when the athlete pushes up in the opposite position, bends the chest and remains in this position as long as necessary;
- bridge from the rack, that is, deflection in the lumbar and thoracic region, with hands placed on the floor. This option is the most difficult.
Before you do a bridge stretch, you need to rule out problems that may interfere with the exercise. As a rule, this is low mobility in the shoulder, knee or hip joint.
Bridge complication
If the level of the classic bridge, along the wall and from a standing position, has already been completed and the execution does not give the desired pleasure, but you want more, then you can introduce complicating elements. For example:
- bridge with one leg (at the final point, slowly tear off one leg and straighten it up as much as possible);
| — the narrowest bridge possible (you need to touch the back of your head to your calves); | |
| - bridge on the elbows (from the final curved stance, lower yourself onto your elbows - this requires increased flexibility); | |
| - go into a handstand and back. |
All these methods not only additionally train muscles, flexibility, vestibular apparatus and sense of balance, but also add effectiveness to the training.
Performing a bridge from a standing position
You can move on to this exercise after you have completely completed and mastered the preparatory complex. It can be performed either against a wall bars or against a regular wall. The main thing is the availability of free space.
Stand with your back to a wall or wall, maintaining a distance of about 80 cm from its surface, with your feet shoulder-width apart. From this position, they begin to lean back until their fingers rest against the wall. To lower yourself, move your fingers along the slats or along the surface of the wall until the moment when your hands are on the floor and a full bridge is made.
The final position is held for several seconds and then returned to the original position. This should be done in the same way as lowering with the help of your fingers, moving them along the wall or slats, but already going up.
When performing a bridge with a wall has been brought to automaticity, you can begin doing the exercise on a gymnastics mat. At first, it is better to perform a bridge on the mat with a partner who will support your back for safety.
To do a bridge on the mat while standing, bend back, stay in the position for a few seconds, and then smoothly lower yourself onto the bridge. You also need to linger in the last position. To take the starting position, just push off the mat with your hands.
You should start making a bridge yourself only after you have gained complete confidence in your own abilities.
How to teach a child to make a bridge
Fundamentally, the approach to developing flexibility and strength in a child to perform a bridge is no different from training in an adult. Children have advantages - they are more flexible and flexible due to the yet unformed muscle corset. In addition, children are less afraid of falling. In any case, the procedure will be similar - warm-up, lead-up exercises, bridge.
It is necessary to pay attention to the mandatory adult control of the process of training children - the exercise is complex and traumatic, especially in more complex versions (with a wall or from a standing position). Adults must certainly monitor the progress of the workout and help in performing the elements.
The benefits and harms of a gymnastic bridge
The exercise is one of those given to children in their first year of gymnastics. It works great for children, since their spine is not yet stiffened, and their shoulder joints are more mobile than those of adults. The exercise involves almost all joints and ligaments of the body, and strengthens the muscles in static conditions. It teaches flexibility and mobility, but it is used specifically in gymnastics as a lead-in to dynamic elements.
Advantages of exercise for an adult:
- corrects posture. Eliminates the habit of sitting, standing and walking with your shoulders rounded forward;
- strengthens the rhomboid and latissimus dorsi muscles;
- helps increase the range of motion in the shoulder joint;
- eliminates slight kyphosis if taken at an early age;
- strengthens all muscles of the body;
- increases mobility in the hip joints;
- increases blood flow to the long back muscle, bone marrow nutrition;
- strengthens the static muscles of the legs and arms;
- allows you to stretch the rectus abdominis muscle and contract the gluteal muscles.
The movement helps relieve the tone of the rectus abdominis muscle and makes it possible to assume a neutral back position. In kinesiotherapy, it is one of the preventative and eliminating problems with the spine that arise due to prolonged sitting.
How to get into the bridge correctly. Nuances and most common mistakes
Contraindications
Contraindications include injuries to the shoulder and hip joints and spine. The bridge can be harmful if the shoulder joints are stiff, even if the problem is not related to injury. In this case, the postural imbalance is first removed, that is, the person is taught to stand, walk and sit with a straight back and correctly turned shoulders, and then they train for stretching to the bridge.
The list of contraindications for the exercise is as follows:
- pregnancy;
- hernias and protrusions of the spine;
- arthritis and arthrosis of the shoulder, hip, knee and ankle joints;
- epilepsy and brain disorders;
- osteochondrosis and the pain syndrome that accompanies it;
- consequences of mechanical injuries.
What kind of exercise is this
Any trainer will tell you that flexibility exercises should be performed by everyone involved in sports or fitness. But they are not given special attention. After all, they can be performed at home - no special equipment, equipment or supervision of a trainer is required.
The exercise is great for beginner athletes who want to develop flexibility. After all, you can get into it at any age, even if you haven’t done gymnastics before. You will have to spend more time doing preparatory exercises, but soon you will be able to do a bridge from a lying position.
A bridge can be made anywhere – even on a bridge.
What muscles does it develop?
The load is applied to a variety of muscle groups, so the whole body will work:
- deep and long back muscles;
- back of the thigh;
- buttocks;
- rectus abdominis muscle;
- lower back muscles.
There are several types of bridges, and each puts stress on different muscles. But overall, this exercise has a beneficial effect on the body.
Benefits of exercise
It’s not for nothing that bridges are recommended for schools and children’s gymnastics sections. After all, from early childhood it will be useful to get the most from this exercise. And it is better to learn how to stand on the bridge in childhood than at an older age. After all, children are much more flexible than adults.
- Develops the back muscles, stretches and strengthens them.
- Increases joint mobility.
- Reduces the amount of calcium deposits.
- It has a positive effect on blood flow, which affects muscle nutrition.
- Prevents displacement of intervertebral discs.
- Corrects posture and eliminates stooping.
But it’s worth repeating - this is only possible if the exercise is performed correctly. If you make mistakes in technique, you can harm yourself.
Contraindications
Although this is a fairly easy exercise, it puts a serious strain on the body. Therefore, there are situations in which it is strictly forbidden to stand on the bridge:
- Pregnancy.
- Osteoporosis.
- Any heart disease.
- After a severe spinal injury.
- During the recovery period from operations or surgical interventions.
In case of chronic diseases, you need to consult your doctor before learning to stand on the bridge. After a hand injury, if you have a gastrointestinal tract illness or fever, you should also refrain from exercising.
How to stand on the bridge
Watch videos with detailed descriptions. This will allow you to notice some shortcomings in other people’s performance, and as a result, avoid them in yourself.
Lead-in exercise
Making a bridge without prior preparation is a bad idea. Moreover, you will not be able to do this, since you need to have strong enough muscles. First, you need to perform easier options that will prepare the muscles for active work.
Bridge with shoulder support
Women especially love it - it perfectly strengthens the buttocks.
To do this you will need to follow these simple steps:
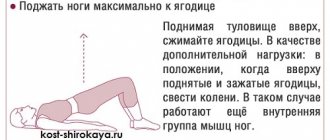
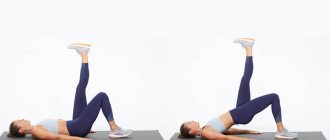
- lie down, bend your knees.
- try to raise your pelvis as high as possible;
- the back should form an arch;
- legs pressed tightly to the floor.
Gradually increase the number of repetitions, but remember the main thing - the quality of execution.
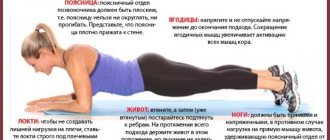
Reverse plank
Simple to do:
- take a standard position. Straighten your back, spread your legs slightly wider than your shoulders. The palms are parallel to the legs.
- lift your pelvis, straightening up. Feel your body stretch; freeze. Only after counting to 10 can you lie down.
This is a description of a completely ideal option, but it requires strong hands. It will not be possible to do it right away, since the muscles will be weak at first. If it is very difficult, then transfer the weight to your knees. You can bend them slightly.
The benefits of this exercise are clear - your arms are pumped up. The upper part of the body is actively working. Arms, shoulders and chest work.
When you can do several approaches without difficulty, then feel free to move on to the next exercise.
Exit to the bridge from the bench
Find a bench to stand up from. You can replace it with a cabinet or stool.
- Sit upright, straighten your legs, rest your hands on the support;
- Lower yourself slowly, your shoulders should lie down;
- Place your hands behind your head;
- Thanks to the fact that our arms are strong, we break away from the support;
- We return to the starting position.
Half bridge
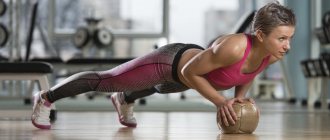
The only difference with the previous embodiment is that the complexity is increased. You will need props in the form of a stable object. A fitball will do, but you can also use a low stool.
- Sit with your back to the object;
- Use your legs and arms equally. Lean your back on the object, but remember that your arms and legs are as tense as possible. Do not lie on the object;
- Lift your body by arching your back. Lock yourself in this position. Lower yourself back.
- Repeat 3 times, holding at the high point for 30 seconds.
Classic bridge
The previous variations will prepare your body so you can easily move on to one of the more difficult variations.
